Master Data Mapping for Process Optimization
Unlock the power of data mapping in ProcessMind. Learn how to connect, visualize, and optimize your processes for better business outcomes.
Mapping datasets is a crucial step in turning raw data into actionable insights within ProcessMind. One of the key strengths of ProcessMind is its flexibility: data can always be added, removed, enabled, or disabled as you go. There’s no fixed order or forced way to integrate data into your process.
You have two primary approaches to working with data:
This flexibility allows you to choose the approach that best suits your needs.
For the purposes of this documentation, we will assume you are starting with an empty canvas and gradually building your process and analysis step by step. If you prefer to start with an existing process, you can import an existing BPMN model , and map data to tasks and events of the imported model directly.
Begin by creating a new process or opening an existing one. The canvas serves as the foundation for your model, where you will map and organize datasets. If you did not already upload your data in the data section, you can also upload data directly from the process view. This can be done by going to the right panel and go to the dataset selection area as represented in the image below.
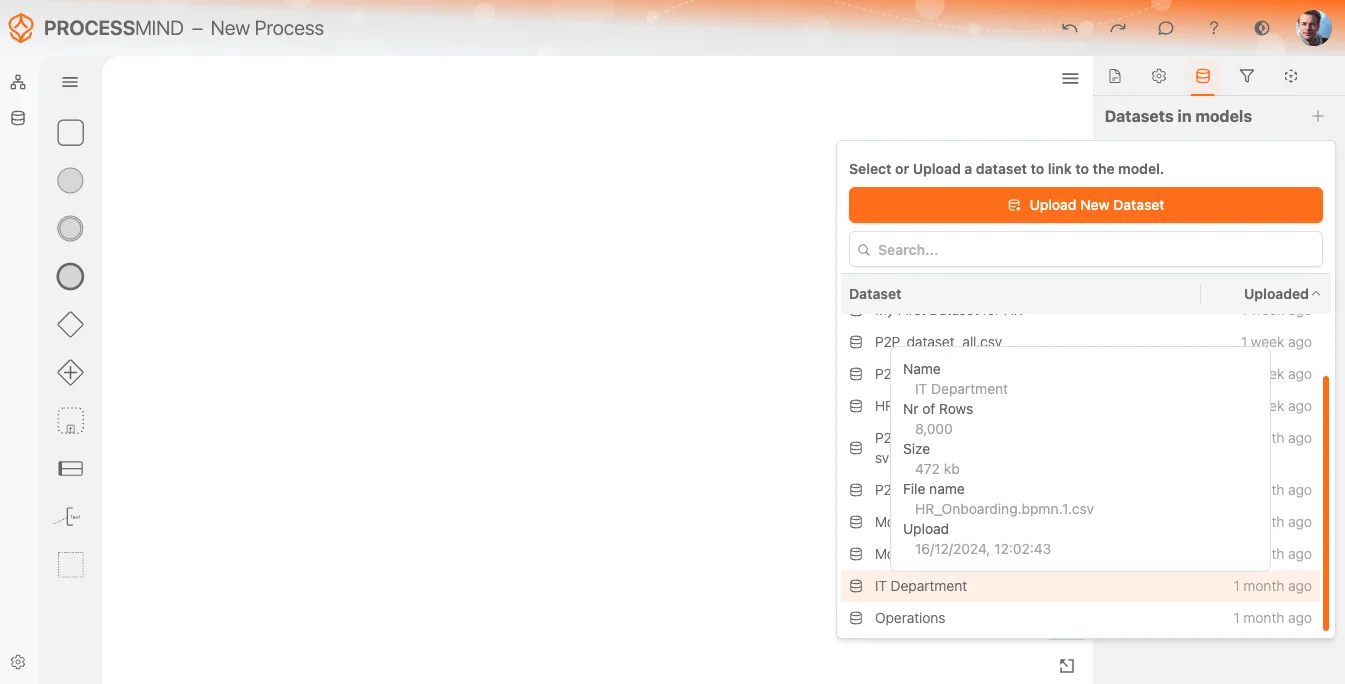
Once your dataset is uploaded and processed, the system will notify you that it is ready to use. You can then select it from the Dataset List, as shown in the image above. The most recently uploaded dataset will always appear at the top for easy access.
When you hover over a dataset in the list, a tooltip will provide additional context, such as:
This helps ensure you’re selecting the correct dataset for your process.
After selecting your dataset, the system will perform some basic pre-processing. This is indicated by a loading icon displayed next to the dataset name.
For the context of your process, you can rename the dataset (if desired) specifically for its use in this process, making it easier to identify later. The switch will give you the option to enable or disable the dataset for the processes.
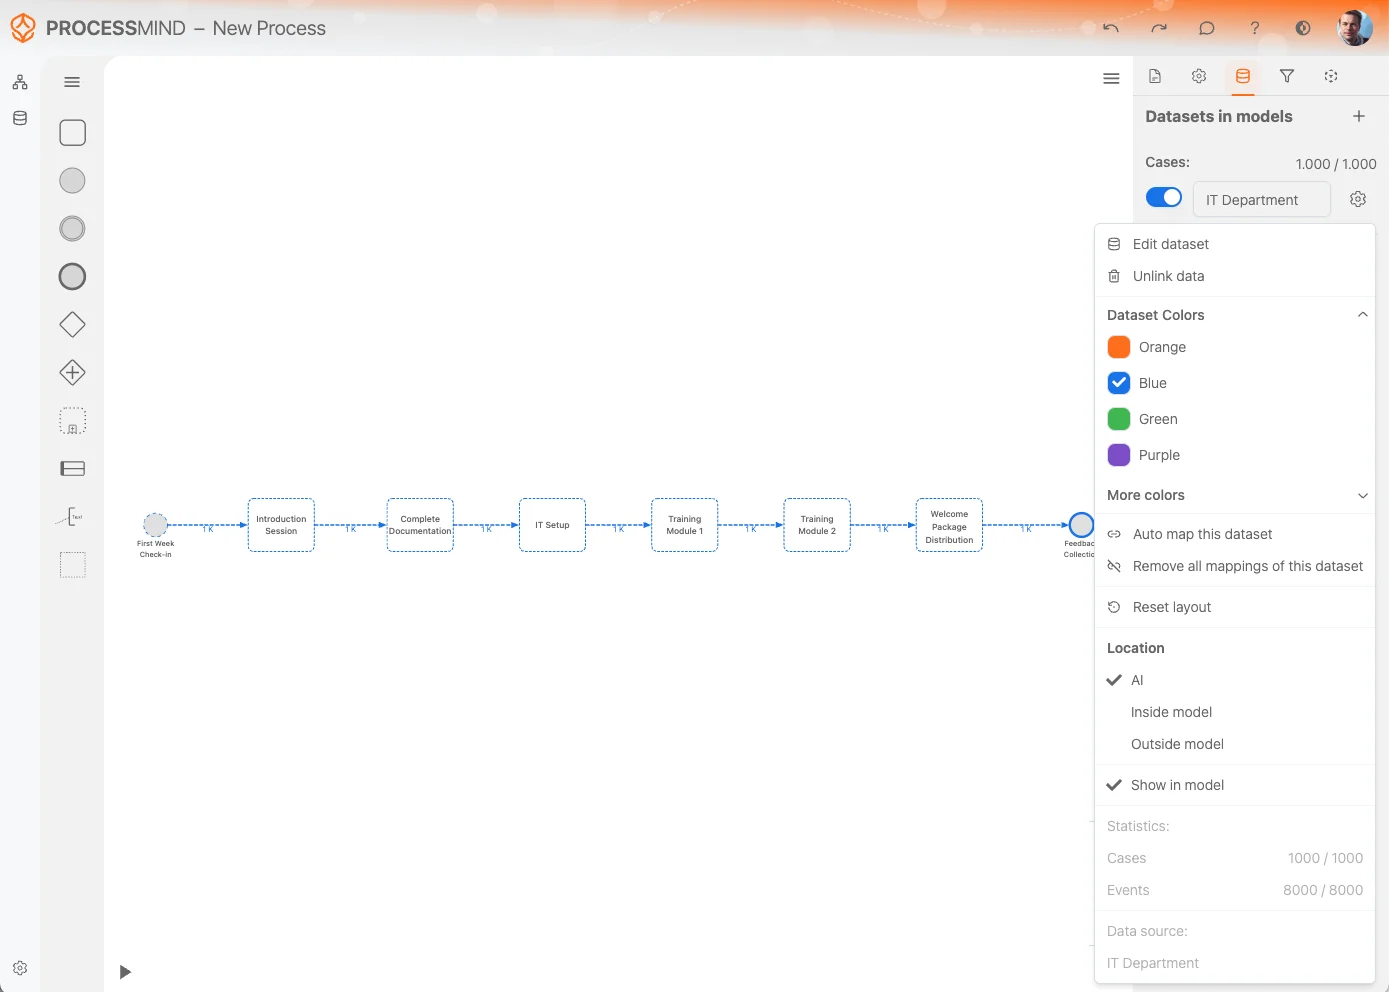
The Dataset Settings Menu offers several options to manage and customize your dataset effectively. Below is a breakdown of the available options:
Edit Dataset:
Quickly access the Edit Dataset option to make changes to the dataset itself. This allows you to modify or refine the dataset directly.
Unlink Data:
If you no longer need the dataset in your process, use the Unlink Data option. This removes all references to the dataset and clears it from your process canvas.
Note: This action does not delete the dataset itself; it remains available in the Dataset List.
Dataset Colors:
Change the dataset color for better visual distinction. The selected color will also apply to activities that are derived from this dataset, making them easier to identify on the canvas.
Auto Map Dataset:
This option attempts to automatically map the dataset activities to existing activities already represented in your process model. This saves time and helps maintain consistency.
Remove All Mappings:
Use this option to clear all activity mappings between the dataset and your process model. This is useful if you need to start over or make significant changes.
Reset Layout:
The Reset Layout option automatically arranges activities and their relationships on the canvas for improved representation and clarity.
Location:
Determine where the auto-generated model will be displayed.
Show in Model:
This option allows you to hide activities found in the dataset that are not directly mapped in the model. Toggle this to manage the visibility of unmapped activities.
Statistics:
View statistical details about the dataset, including:
By using these options, you can effectively manage the integration, representation, and behavior of datasets within your process models, ensuring a smooth and organized workflow.
Once the dataset is fully loaded, the system will automatically display the process mining result on the canvas. This initial process map is a free-floating model without any fixed attachments. To make it a part of your process design and editable, you need to map it to an existing model or activity, or convert it into a fixed model.
There are two main ways to fix activities from the floating model to the canvas:
Individually Select Activities:
Select specific activities to map individually.
Bulk Selection:
Use the selection tool or keyboard shortcuts to select multiple activities at once:
Ctrl + A (Windows) or Command + A (MacOS) to select all activities.After making your selection, a new context menu will appear next to the selected activities. From here, you can choose the following action: Add to Model: This option fixes the selected activities to the canvas, allowing you to:
By fixing your dataset’s process map to the canvas, you can begin enriching your process with detailed attributes, relationships, and context, turning raw data into actionable insights.
Unmapped activities are activities present in the dataset but not yet mapped to any attributes in the model. These represent potential gaps or elements that need further integration into your process design.
When you toggle the Unmapped Activities option on or off, the unmapped data will be visually represented with dotted lines. This makes it easy to identify and distinguish these activities from mapped ones.
In the visual example, you can observe the before and after states of toggling the unmapped activities option:
Using this feature, you can efficiently manage and address unmapped data, ensuring your process model is as complete and accurate as possible.
Mapping datasets in ProcessMind transforms your data into a powerful tool for process analysis. Whether you start with a defined process or raw data, the platform’s flexibility ensures you can build and refine your model as needed. By following these steps, you can confidently create a complete model that reveals actionable insights and drives process improvement.
We use cookies to enhance your browsing experience, serve personalized content, and analyze our traffic. By clicking "Accept All", you consent to our use of cookies.